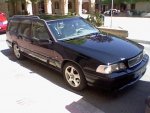
VOLVO V70. 2.5T. 1996 ¿Sigo metiendo dinero?.

fragatino

Miembro Iniciado
2 Jul 2011
66
0
57
#1
Buenas a todos:
He desaparecido en Agosto por vacaciones pero vuelvo.
En otro post (piloto verde) contaba mi historia. Compré un volvo V70 con 187000 Km, gasolina, siete plazas, óptima y de cuero beige. Bonito y motorazo. Tuve problemas con un dichoso piloto verde que han desaparecido tras limipar caudalímetro. Se comprobó la sonda lambda y funciona. Al coche le hemos hecho 5000 Km y nunca nos ha dejado tirado. De chapa está bien. Lo he llevado a dos talleres y el aspecto es bueno. Ahora bien he tenido algunos problemas más que hacen plantear dudas sobre sí seguir o no metiendo dinero. Ahí van las consultas:
 

fragatino

Miembro Iniciado
2 Jul 2011
66
0
57
#2
Perdon:
He incluido el post sin las preguntas:
a) Ahora me salta la alarma del SERVICE al arrancar. El coche arranca sin problemas, incluso habiendo estado parado. Esa alarma desaparece al cabo de un minuto y no vuelve a encenderse salvo que arranque de nuevo. ¿batería?. Al aprecer comprobaron el motor de arranque y tiraba bien.
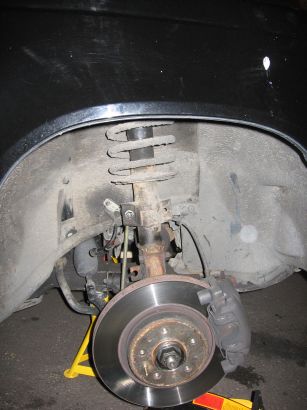
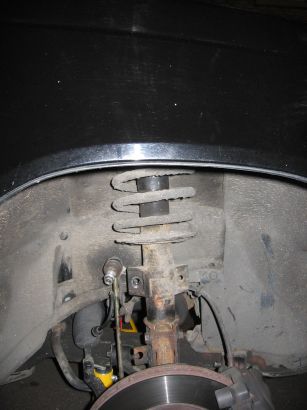
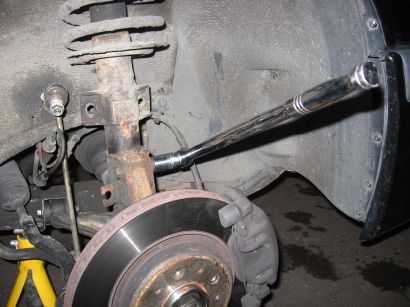
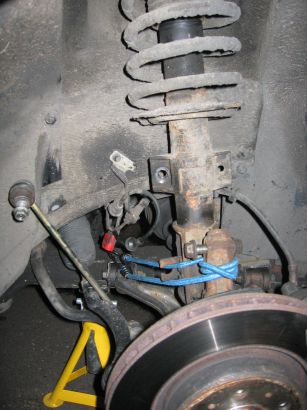
b) Tuve una avería que me dió un susto monetario. Tuve que cambiar biela y cojinete de la rueda derecha delantera debido a un ruido constante que hacía. Ahora cuando giro del todo a la derecha al llegar al tope, se oye un "clonc" leve.
c) No ha vuelto a saltar el piloto verde pero es cierto que cuando el coche va justo de gasolina (10 L en marcador) o incluso en reserva, si el coche sube una cuesta le falla potencia (ocurre a veces, muy aisladamente). Todos me han dicho. No hay problema, ponle gasolina y problema resuelto, pero me gustaría saber algo. No he comprobado depósito y boya. Está cambiado filtro de gasolina.
d) Problemas menores. El cuero del volante está gastado, no descascarillado. He comprado tinte bueno para retintarlo. El cuero está bien pero con grietas aunque el aspecto es bueno (no roto ni con demasiadas grietas). La chapa bien, aunque me gustaría pulirlo. Tengo experiencia aplicando el pulimento 3M. ¿Vale la pena?. No quiero sólo cera que se vaya con el primer lavado.
COmo veis son muchas cosas. El coche tira que da gusto. Consumo (segun ordenador) en ciudad de 13 L (lógico). Es un armatoste pero da mucha seguridad. Lo saqué un día de nieve y se portó genial. Me lo han querido comprar gente que lo ha visto por la calle, pero le he cogido cariño, aunque como muchos andamos de presupesto justo.
Saludos. Por cierto Gabach, espero que lo leas pues agradecí tus consejos.
coche1volvo.jpg
 
#3
A) te avisa que el mantenimiento esta proximo. Cuando toque se quedara puesta hasta que lo resetees. Mira el libro de mantenimiento y asegurate de hacer lo que dice mas lo que sea de sentido comun. Luego es borrar el aviso como ya se ha dicho en el foro.

B) probablemente sea mas bien una copela. No son caras pero labororiosas esas reparaciones. Es algo que con el tiempo acaba saliendo ya que son de goma y con el tiempo esas piezas se revienen y pierden su efecto. Cuenta con cambiar las delanteras, y hay 2 por amortiguador.

C) limpieza de la mariposa de admision. Aunque la lambda este bien, si no se ha camiado con ese km es de esperar que toque cambiarla en breve. Es la delantera la que siempre te dara prolemas. El consumo bajara cuando limpies la mariposa y tanbien cuando cambies la lambda, espera bajar con ambas operaciones a la banda de 8.5-9l/100

D) ni idea... No puedo aportar nada...

Gabach es un figura y se lo conoce de pm. Hazle caso, que sabe de lo que habla. Bebe de las fuentes de la sabiduria, puesto que las tiene muy cercanas. :)
 

RAMALOJI

Miembro Master
20 Abr 2007
4.203
7
63
#4
Perdon:
He incluido el post sin las preguntas:
a) Ahora me salta la alarma del SERVICE al arrancar. El coche arranca sin problemas, incluso habiendo estado parado. Esa alarma desaparece al cabo de un minuto y no vuelve a encenderse salvo que arranque de nuevo. ¿batería?. Al aprecer comprobaron el motor de arranque y tiraba bien.

se programa en la volvo para avisar de que debes hacerle el mantenimiento

no te preocupes ,yo lo uso de temporizador asi se que ha calentado :)

hasta que no se apaga no corro con el coche

b) Tuve una avería que me dió un susto monetario. Tuve que cambiar biela y cojinete de la rueda derecha delantera debido a un ruido constante que hacía. Ahora cuando giro del todo a la derecha al llegar al tope, se oye un "clonc" leve.

c) No ha vuelto a saltar el piloto verde pero es cierto que cuando el coche va justo de gasolina (10 L en marcador) o incluso en reserva, si el coche sube una cuesta le falla potencia (ocurre a veces, muy aisladamente). Todos me han dicho. No hay problema, ponle gasolina y problema resuelto, pero me gustaría saber algo. No he comprobado depósito y boya. Está cambiado filtro de gasolina.

d) Problemas menores. El cuero del volante está gastado, no descascarillado. He comprado tinte bueno para retintarlo. El cuero está bien pero con grietas aunque el aspecto es bueno (no roto ni con demasiadas grietas). La chapa bien, aunque me gustaría pulirlo. Tengo experiencia aplicando el pulimento 3M. ¿Vale la pena?. No quiero sólo cera que se vaya con el primer lavado.
COmo veis son muchas cosas. El coche tira que da gusto. Consumo (segun ordenador) en ciudad de 13 L (lógico). Es un armatoste pero da mucha seguridad. Lo saqué un día de nieve y se portó genial. Me lo han querido comprar gente que lo ha visto por la calle, pero le he cogido cariño, aunque como muchos andamos de presupesto justo.

Saludos. Por cierto Gabach, espero que lo leas pues agradecí tus consejos.
Ver el adjunto 10873

si el coche esta bien en general hazle un STAGE 0 y puedes tener coche para otros 200,000

como minimo
 
JAD

V4L

Miembro Master

gabach

Miembro Master
9 Jun 2008
8.473
29
BCN city
#5
buenas! que exagerados sois jejeje

la sabiduria me visita de vez en cuando con su V70R naranja jejeje

tu coche no sufre ningún problema que no se pueda solucionar con mania, tiempo y algo de dinero...

pero piensa que para tener un coche similar a este a nivel de comodidad, equipamiento, Look, motor... tendrás que invertir muuuuucho más de lo que te costaría tener este como nuevo y para 200.000km más como lo dice Rafa.

no es nada descabellado hacerle 600.000km a este coche con este motor.... en Francia vemos de vez en cuando anuncios de T5 o 2.5T con más de 400.000km y se venden bien porque van como el primer día!!!

que disfrutes del coche, el no te dejaría ;)

saludos
 

fragatino

Miembro Iniciado
2 Jul 2011
66
0
57
#6
Muchas gracias de nuevo.
Pondré en marcha los consejos y os diré.
Pasé la ITV y sin problemas. Por cierto estuve en el conce hace unos 7500 km y en teoría me lo pusieron todo OK. Sin embargo como comenté en otro post, de casualidad le miré los niveles con 6000 km y le faltaban 3 l de aceite (¡¡¡). he hecho otros 2000 km y el nivel no se ha movido. (expediente X ¿?).
Queda una duda.
¿Pulimento?¿3M?. ¿sólo cera?.
Además ¿Que es un stage 0? perdón por la ignorancia (suma)
Gracias
PD especialmente a Pkt y gabach. Sois unos gurús.
Me he llevado una alegria (pequeña). El coche era de un sueco (tiene el libro oficial) aunque ya sé que se pueden trucar, pero el libro de información estaba en sueco (sin sueca). Me ha llegado uno en castellano de segunda mano por 14 euros, y la de cosas que he descubierto.
 
#10
Muchas gracias de nuevo.
Pondré en marcha los consejos y os diré.
Pasé la ITV y sin problemas. Por cierto estuve en el conce hace unos 7500 km y en teoría me lo pusieron todo OK. Sin embargo como comenté en otro post, de casualidad le miré los niveles con 6000 km y le faltaban 3 l de aceite (¡¡¡). he hecho otros 2000 km y el nivel no se ha movido. (expediente X ¿?).
Queda una duda.
¿Pulimento?¿3M?. ¿sólo cera?.
Además ¿Que es un stage 0? perdón por la ignorancia (suma)
Gracias
PD especialmente a Pkt y gabach. Sois unos gurús.
Me he llevado una alegria (pequeña). El coche era de un sueco (tiene el libro oficial) aunque ya sé que se pueden trucar, pero el libro de información estaba en sueco (sin sueca). Me ha llegado uno en castellano de segunda mano por 14 euros, y la de cosas que he descubierto.
Perdon? Yo? Gurú? :-O Me han llamado muchas cosas pero eso... :_ja::_ja:

No, en serio, no soy ningún gurú! Ramaloji es EL GURÚ, Oh oráculo! Gabach es increíble, y todos los demás son espectaculares. Yo soy aprendiz de mago. Leo y leo. En lo que puedo ayudar, ayudo.... Y gracias a todos los gurús de aquí, yo le he perdido mucho miedo a hacerle cosas al coche. Respeto sí, pero el justo. Es como los médicos: te informas antes de hacer cada operación: qué te vas a encontrar y trazas un curso de acción. Eso en mi caso. El resto que tendrá más experiencia seguro que se lanza más.

Últimamente no llevo al taller el coche sin saber antes qué le pasa....
 

RAMALOJI

Miembro Master
20 Abr 2007
4.203
7
63
#11
Perdon? Yo? Gurú? :-O Me han llamado muchas cosas pero eso... :_ja::_ja:

No, en serio, no soy ningún gurú! Ramaloji es EL GURÚ, Oh oráculo! Gabach es increíble, y todos los demás son espectaculares. Yo soy aprendiz de mago. Leo y leo. En lo que puedo ayudar, ayudo.... Y gracias a todos los gurús de aquí, yo le he perdido mucho miedo a hacerle cosas al coche. Respeto sí, pero el justo. Es como los médicos: te informas antes de hacer cada operación: qué te vas a encontrar y trazas un curso de acción. Eso en mi caso. El resto que tendrá más experiencia seguro que se lanza más.

Últimamente no llevo al taller el coche sin saber antes qué le pasa....
y aunque parezca metira.me pongo colorado cuando me citas.......

me pongo coloraadooooooooooo... :_dan2::_dan2::_dan2::_dan2::_dan2::_dan2:


[video=youtube;0jmZrp3ReYE]http://www.youtube.com/watch?v=0jmZrp3ReYE[/video]
 
Última edición:

gabach

Miembro Master
9 Jun 2008
8.473
29
BCN city
#12
jejeje de guru nada que me cuelgane ne la plaza pública jejejeje

para el pulido habla con $UPER y Jenio ellos te aconsejaran ya que tocan el tema de limpieza de coche y el llamado "detailing"

cuando compré mi V70 le hice el Stage 0 poco a poco, en función de los medios, y intentando hacerle a la vez el Stage 1...

el Stage 0 es revisar el coch y cambiar las piezas que se habran desgastados para intentar recuperar la juventud que tenía años atrás..

el Stage 1 es modificar unos elementos básicos del coche para mejorar su comportamiento y darle más alegría al motor...

el Stage 2 es ya más serio con modificaciones más importantes a nivel de motor, de ejes, y que dan al coche un caracter más deportivo con por supuesto más CV...

el Stage 3 ya es para profesionales, Turbo Gordo, escape a medida, reprogramación brutal, frenos gordos... etc... presupuesto altisimo y dejar de lado el aspecto comodo y practico del coche a favor de una deportividad extrema...

espero haber ayudado!

saludos
 

fragatino

Miembro Iniciado
2 Jul 2011
66
0
57
#13
Gracias y por supuesto debería citar a RAMALOJI.
He seguido ese post y tengo que decirte que gracias a el en parte quiero seguir con el coche.
En estos momentos de supervivencia voy por lo básico. Es decir, asegurarme que no me deje tirado. Pero tengo en mente irlo rejuveneciendo. Lo de la biela fue un susto bueno, pero después de haberos leido, iré a por lo de la mariposa y sonda lambda. Me ha sorprendido que se pueda optimizar el consumo, pues suponía que era tragón de por sí (y debe serlo por la potencia que tiene). Os iré contando.
Saludos
 

juanfc

Miembro Elite
28 Jun 2009
5.562
2.376
2023
#15
B) ¿tienes topes de dirección en el trapecio? si los tienes, ¿están engrasados?

Si es una copela (¿2 por amortiguador?) te haría un clonc en los baches, con independencia del giro de la rueda, si es eso aprovecha para cambiar amortiguadores, que falta les hará

salu2
2005 xc70 2.5T manual ( y para navidades una repro)
 
#16
Si, hay dos copelas por amortiguador en una mcpherson, la superior y la inferior:

http://www.aficionadosalamecanica.com/suspension3.htm
El conjunto muelle helicoidal-amortiguador. El amortiguador (5) va anclado de forma fija a la parte superior de la mangueta (1) y el muelle (6) es concéntrico al amortiguador y está sujeto mediante dos copelas superior (C) e inferior (D). El amortiguador está unido al bastidor por su parte superior mediante un cojinete de agujas (7) y una placa de fijación (8). En las ruedas delanteras se hace necesaria la existencia de este cojinete axial ya que el amortiguador al ser solidario a la mangueta gira con ésta al actuar la dirección.


Pero es casi más probable que sea lo que dice juanfc de los topes. Gira a tope hacia donde oyes el clonck (o que te giren) y mantenlo ahí y mira dónde toca con el paso de rueda. Asumo que es en parado y no en movimiento, porque de ser en movimiento sería casi seguro la copela superior, que está revenida.
 

juanfc

Miembro Elite
28 Jun 2009
5.562
2.376
2023
#17
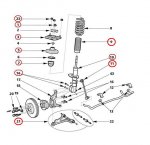
OK, perdón, es que lo que yo entiendo por copela en nuestros volvos es la pieza 5...


salu2 VolvoFrontSusp.JPG
2005 xc70 2.5T manual
 

RAMALOJI

Miembro Master
20 Abr 2007
4.203
7
63
#19
buena pagina para verlo mas claro


http://translate.google.com/transla...www.volvoforums.org.uk/showthread.php?t=47072


After talking to several people at the October Crooked Billet meet it was agreed my 850R estate's front nearside damper was on its way out. It had been riding particularly harshly over potholes on that side, and despite passing an MOT in August it was continuing to bounce once or twice after a firm compression.

I asked Noiseboy his opinion on whether this was a job a hobbyist like me could do myself (it's 3 spanners in Haynes) and he pretty much advised to be bloody careful with springs under compression but apart from that it should be doable.

So with that in mind I found a supplier who would do me all round Koni Sports Suspension Kit SSK162 (including 4 free bumpstops and P&P) for just over £400:

Awesome

I think it was Andy I spoke to on the phone, and he sorted them out coming straight from Koni. They thought I'd have a wait due to the springs being out of stock but actually ANC couriers delivered it all later that week.

I'd already been to the Volvo dealership to get the following bits:

1x 9153007 - 4 sleeves for the steering knuckle bolts
1x 971099 - 4 steering knuckle nuts
1x 985868 - 6 strut top mount nuts
1x 982845 - 4 steering knuckle bolts

Total cost around £17 inc. VAT (no discount).

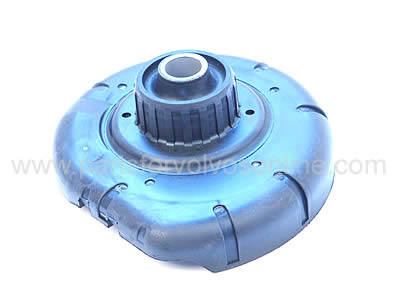
I also found both strut top lower mounts were worn (metal sleeve splitting from rubber surround) - £18.53 inc VAT each from:

Parts For Volvos

Here's what happened.


First, jack up the front of the car and support both sides on axle stands. Raise both, even if you're going to only do one side - I found it's much harder to remove the anti-roll bar connecting link if only one side's in the air!
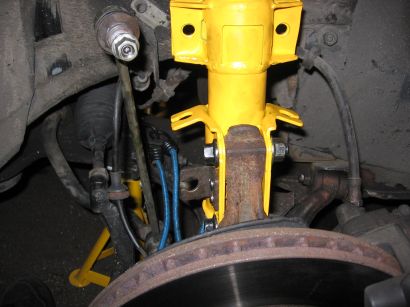
Next put the jack under the suspension control arm and raise just enough to take the weight. Once we've removed the suspension strut the wheel hub will flop around all over the place (not good for driveshafts I believe), so we want it at least supported from underneath.


Here you see I've removed the ABS connector and anti-roll bar connecting link. On my nearside I had an old one which undid using a 16mm open spanner behind to stop the thread turning in the ball joint, and a 15mm socket on the front.

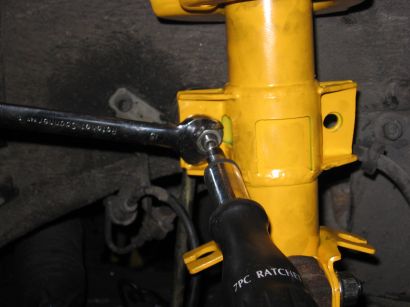
On my offside Volvo had replaced one for me and the new type has a Torx slot cut in the thread, so use a screwdriver with Torx bit to hold whilst using a 15mm open spanner to loosen the nut. I couldn't get my ratchet spanner over the nut, it was too close to the strut body.


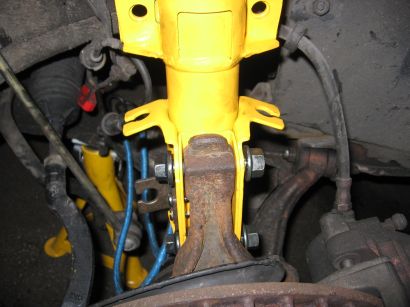
Here I'm breaking the steering knuckle nuts free. I think the bolts were 17mm and nuts 18mm on the ones coming off. The new bolts were 15mm for some reason.


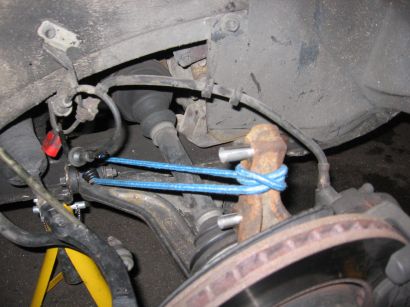
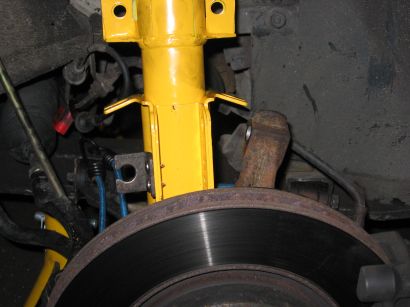
With the bolts out you can separate the strut from the steering knuckle. As I said, the knuckle will now flail about so I used a sproingy attached to the suspension control arm subframe mount point to hold it steady.


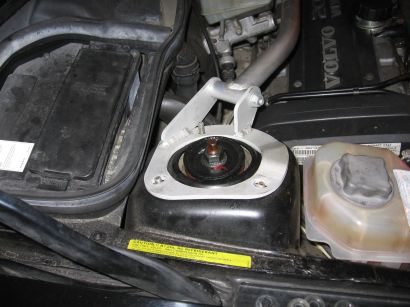
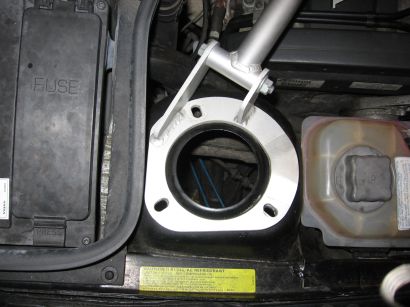
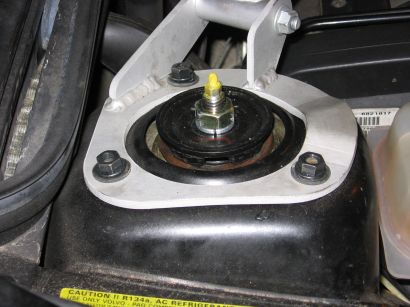
Up to the engine bay now to remove the 3 strut top mount nuts and washers (strut brace optional :)
It is advisable at this stage to loosen the leg top nut slightly this will help you later


You're now free to withdraw the old strut. Be careful, remember that spring is still under some compression.


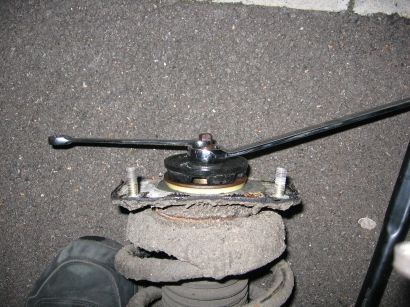
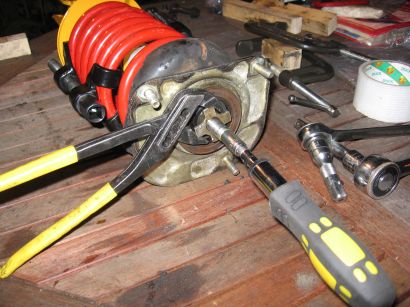
Be warned, I'm only breaking the strut mount nut loose here - the spring needs to be compressed before doing any more than loosening it. I didn't have the special tool recommended, so a 9mm open spanner on the flats of the thread had to do. Use plenty of WD40, and you should be able to loosen the 21mm nut.


Don't forget to pop the new sleeves into the steering knuckle. Apparently you may find some in there, but all 4 need to be present on refitting for the person who'll be adjusting your camber after you're done - they will remove zero or more as necessary to adjust.


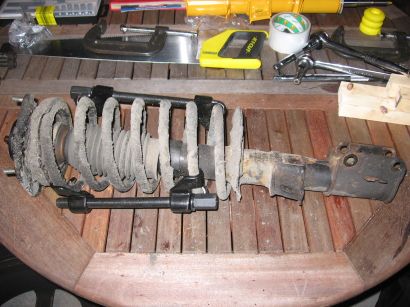
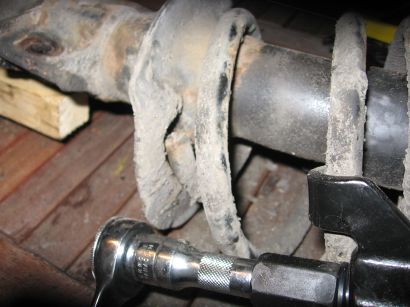
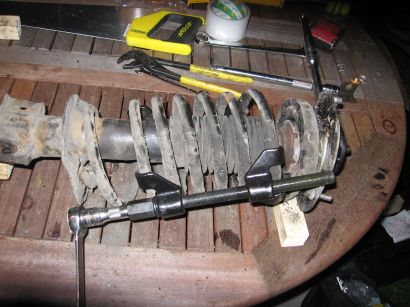
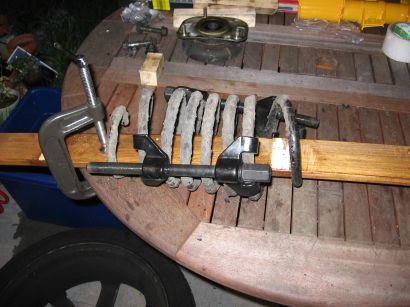
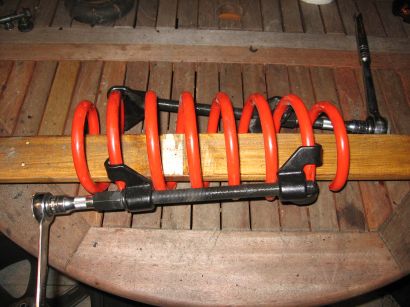
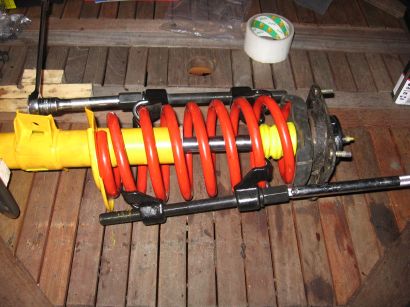
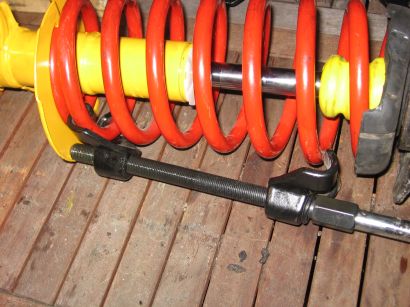
Here's the spring compressors going on. Note I'm catching 6 coils as recommended.


Don't forget to remove the ABS wire bracket - my Koni kit came with new self-tapping screws to attach to the new strut.


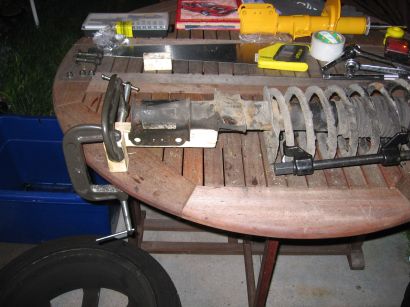
If you don't have 2 people handy, you'll want to clamp the strut well for this next bit :)


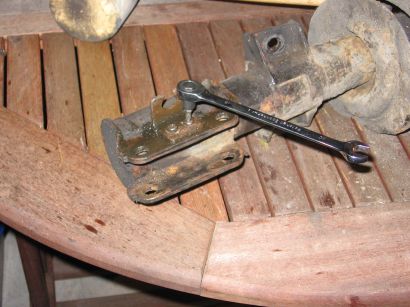
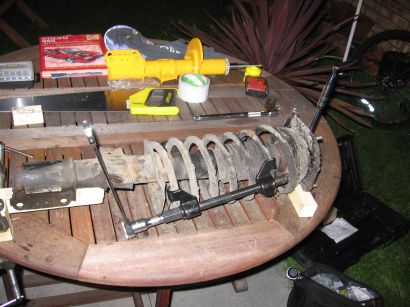
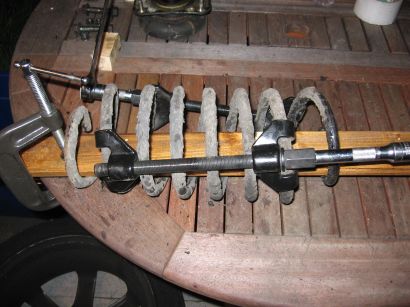
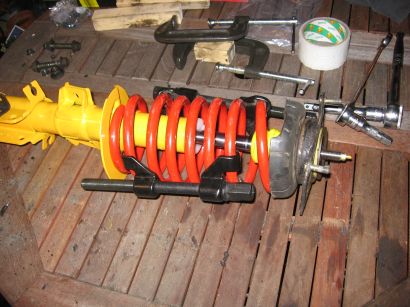
Here I have my normal 1/2" wrench and a 19mm ratchet spanner with a 1/2" wrench adaptor. Very handy to have 2 wrenches available at once to tighten the spring compressors together. Avoid letting one get more than 1cm tighter than the other. I found I needed 1/2" extension bars to get good access.


Here you can see I've compressed enough to bring the spring away from the bottom of the strut.


Here's a zoomed out shot of the compressed spring.


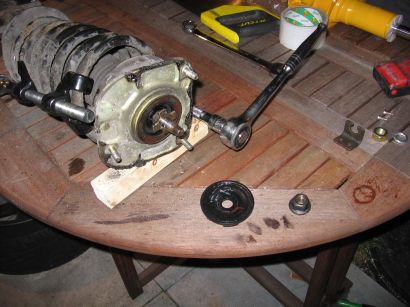
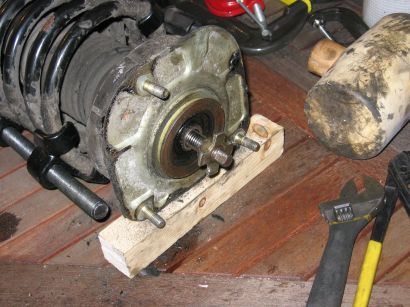
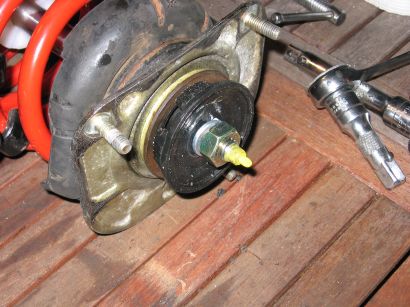
With the spring safely compressed I've fully removed the strut mounting nut and 'special washer' as Haynes call it. You can see the cross-shaped shock absorber retaining nut.


I'm not going to lie to you, getting this off was a pig. I pretty much rounded off the 9mm flats on the thread trying, so in the end used mole grips on what was left, and used a rubber mallet hitting a block of wood against the cross shape to break it loose.

You might wish (like I did) you'd had the right tool from:

IPD


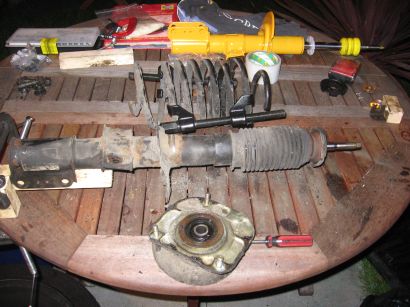
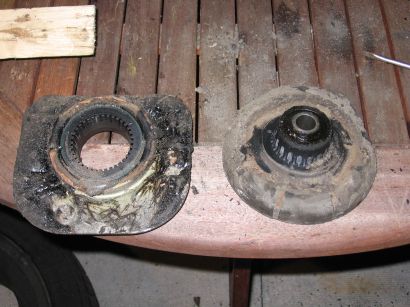
Here's the strut completely dismantled. I'm separating the strut top mount upper and lower with a screwdriver.


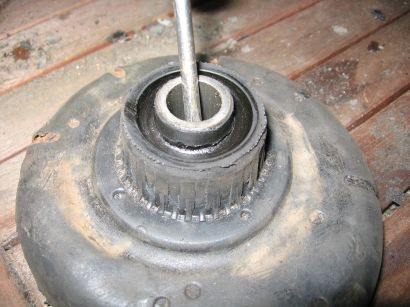
And here they are separated - pretty messy! You may wish to check the ball race in the upper is spinning freely and pack it with new grease.


Here's the worn out rubber in the lower.


To remove the spring clamps I clamped the spring against the table to hold it still while undoing the clamps.


Be warned, the sping clamps I'd bought (Laser ones from Halfords) weren't quite long enough to unscrew completely having released all the spring tension. I had to be rather careful as the thread came out of the bottom hook to catch it and the wrench being ejected under some pressure.

If you're worried, I suggest you do the last bit with the spring on a plank of wood on the ground, and don't keep your head or anything else you care about over the spring as it releases.

You have been warned (however I survived just fine :)


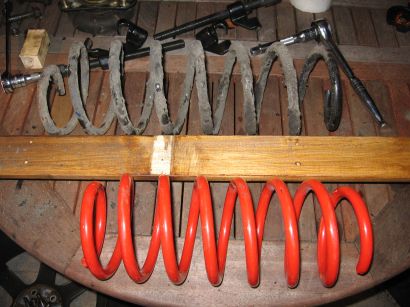
At this point I'm terrified I've got the wrong springs - my 850R didn't need to be any lower! Turned out fine though.
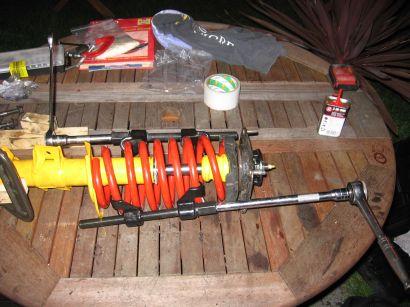

Here I'm compressing the new spring (6 coils, as before). Be careful with the placement of the hooks, you need to be able both to get at the 1/2" end of the thread and to remove the hooks once the spring is uncompressed in its mounts.

I say this since I put the compressed spring on strut only to realise I'd have to uncompress, move the hooks and recompress it all again. What a waste of time and effort ;-)


Don't forget to mount the ABS wire bracket to the correct side of the new strut. I was concerned the screw points sticking through wouldn't slip back over the steering knuckle so I snipped at them with some bolt croppers. In actual fact the knuckle curves inwards between the two bolts so this probably wasn't necessary.


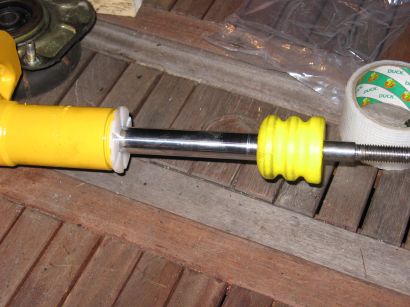
The instructions said to put that white washer in there. No idea what purpose it serves, but I figured I could always cut it out after the fact. Also, note the bump stop has been installed.


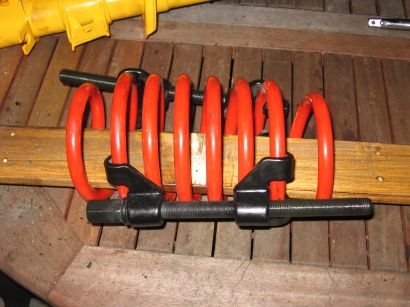
Here's the compressed new spring ready to go on.


And here it is on the strut. Note how I have good access to locate the bottom of the spring into its 'seat' on the strut. You need to ensure you keep the top and bottom of the spring in the right place so they locate in their seats on the strut as you uncompress the spring.


Put the entire strut top mount on the strut, and put the cross-shaped shock absorber retaining nut back on. I have no idea how you're meant to know when it's at 70Nm of torque.

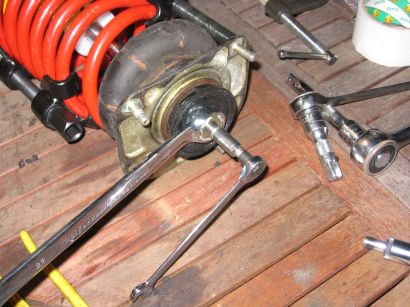
Instead of 9mm flats on the thread the new strut had a whole 9mm nut as part of the thread construction, so you need to keep the thread from turning as you tighten the cross nut.

Beware again that I rounded off this nut with a 12 point ring spanner - here you can see I'm using a 6 sided 9mm socket instead.

The cross nut is basically tightening the metal sleeve of the strut top mount against the main strut shaft with only the bump stop providing a bit of resistance.


You *must* then attach the 'special washer' and strut mounting nut before attempting to decompress the spring. I made this mistake, and found to my horror that the uncompressing spring helpfully just pressed the metal sleeve out of the strut top mount lower rather than being held by the top mount.
Thank goodness I made that error on the old, cracked one. I didn't have much choice but to get a new one then!


I tightened the new, 22mm nut supplied with the Koni kit onto the split ring washer while holding the thread from moving with the 6 point 9mm socket. Again, I have no idea how you're meant to know when you've hit 80Nm of torque.

I asked around but no-one had a 22mm torque spanner, and when I found a 22mm crow's foot (open spanner head with square hole to accept 3/8" wrench) I still couldn't get satisfactory results with that on my torque wrench.

As an aside, since the centre of the crow's foot is further from the handle than the original torque wrench's square drive, you need to reduce the amount of torque anyway. My missus (a maths teacher) worked out a 50cm torque wrench with a 2.5cm crow's foor offset meant 80Nm came down to about 76Nm for what it's worth.


Here I'm finally uncompressing the spring.


Getting there... Note the near compressor thread is rubbing on the mount, taking yellow paint off. As I said, access can be tricky but as you see I couldn't have moved the compressor right one coil else I'd foul the top mount. What fun :-/


Bit of a struggle to get the near one free as it nearly fouled the bottom mount on the strut.


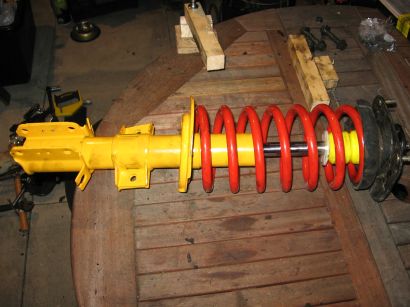
Job's a good'un - completed strut assembly ready for refitting.


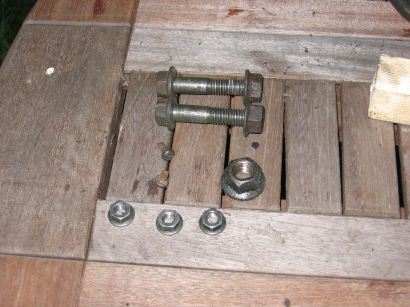
You should now have some stuff to throw away - an old 21mm strut mounting nut, 2x 17mm steering knuckle bolts, 2x 18mm knuckle nuts, 3x strut upper mount nuts, 2x ABS wire bracket Torx screws.


A quick view down from the engine bay I won't see again soon!


Have the 3 new strut upper mount nuts and washers handy. I pushed the strut assembly up into the wing, having turned the metal strut top mount upper to have the flat edge facing away from the engine bay and held it in place with the 3 nuts.


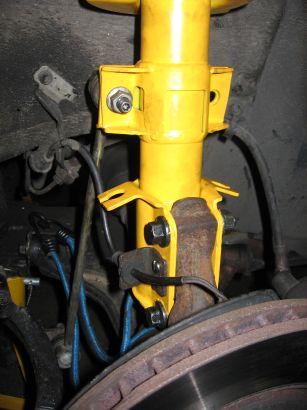
Then, remove the sproingy and manoeuvre the strut back onto the steering knuckle carefully.


You may need to use the jack to lower or raise the suspension control arm to slide the steering knuckle bolts back in. They go to 65Nm then an additional 90 degrees (quarter turn).


Retrieve the anti-roll bar link.


Do the nut up while holding the thread still with the Torx bit. Torque up afterwards to 50Nm.


Don't forget to re-route the ABS wire through its bracket and reconnect. Also, don't forget to go back into the engine bay and torque the 3 strut upper mounting nuts to 25Nm.


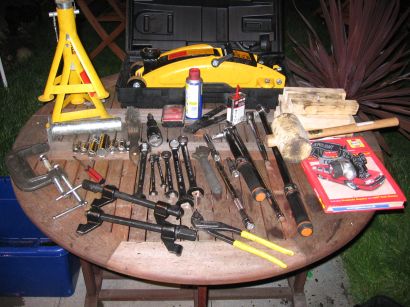
Well, there's every tool I used for this job. Some might have been unnessary, but here's the list:

Spanners in 9mm, 15mm, 21mm, 22mm.
Ratchet spanners in 10mm (used with 7mm Torx bits), 19mm (used as 1/2" wrench).
Sockets in 9mm, 13mm, 15mm, 17mm, 18mm, 19mm and 22mm.
Axle stands.
Jack.
G clamps to hold the strut assembly or spring still.
Assorted bits of wood.
Screwdriver for levering things.
Spring compressors.
Adjustable spanner.
Bolt croppers.
Oil (for bolts).
WD-40.
2 torque wrenches (one <60Nm, one >60Nm).
1/2" wrench.
1/2" extension bars.
1/2" breaker bar.
Head torch (it's dark when I get to play these days).
Haynes manual for a bit of moral support.
Rubber mallet for persuasion (cross-nut, tapping out old steering knuckle bolts).
Wire brush (some screws/nuts/bolts need serious cleaning before even WD-40 will help).

All in all, the 2nd side which went a lot better than the 1st took me 3 hours, so if you're as speedy as me (lol!) I'd say allow a day for both and some mistakes.

I thought after doing just the nearside and lowering that the ride height was actually higher now, but after a quick loop round the block everything had bedded in nicely, and the nearside was exactly the same height as my original offside.


http://www.volvoforums.org.uk/showthread.php?t=47072


.